Nina Sedykh
Sand painting- new and at the same time simple look visual arts preschoolers, accessible to almost everyone and not requiring special training. And for the teacher, this is another way to understand the child’s feelings. Sand it's amazing and mysterious natural material, which is capable of conveying a lot at the same time. And a feeling of the diversity of nature, and a feeling of the capabilities of your body, and the essence of life in general with its fluidity, surprise, diversity of forms. It can be dry and light, wet and plastic.
At the same time, it is so fickle, figures made from it can crumble in an instant. How nice it is to touch sand, watch it pour from palm to palm or build sand castles from it

In past academic year I organized a creative studio in our kindergarten "Gnome". The goal of which development creative potential preschoolers. During the studio classes, children had the opportunity draw not only on paper, but also on sand. Since our kindergarten has special education groups, our studio is visited not only by typically developing children, but also by children with disabilities. disabilities health. This special inclusive approach helps "special" children feel like an ordinary child, accepting sincere care and friendship.
This year we are mastering a new direction - color drawings sand.
Color sand is attracting increasing interest as a material for artistic creativity children. This is an amazing material to create. "bulk" paintings, pleasant to the touch, plastic and colorful, make it easy to realize the most fantastic ideas!

This technique helps develop fine motor skills in children. Fine motor skills of the hands interact with such higher properties of consciousness as attention, thinking, optical-spatial perception, imagination, observation, visual and motor memory, speech. Sand being colored, is able to influence children through color: yellow - fills with warmth, red - adds optimism, blue - has a calming effect, green - inspires with freshness. Observation and experience show that playing with sand, has a positive effect on the overall well-being of children.
I offer you a coloring recipe sand:
1. Find required amount (according to the number of colors you plan to paint the salt in) small containers for preparing colored salt. It is very convenient to use ziplock bags for this purpose, fastened like a zipper. When mixed in such bags sand mixes well with the dye and does not spill out. As a dye, you can use dry tempera powder, food coloring, I use universal colors.
2. Dilute the color with a small amount of water and carefully pour it into the bag with sand, then sand mix with the dye using massaging hand movements - this process is reminiscent of kneading dough. After mixing sand with the dye, leave the mixture for about 30 minutes to the sand is well painted.
3. Pour out the dyed sand onto sheets of paper or large diameter disposable paper plates. Lay out sand apply as thin a layer as possible and dry overnight. Instead of sand you can use salt. The color is brighter and more saturated.

Exist various ways painting with colored sand. On initial stage You need to have PVA glue, cardboard for the base, a simple pencil on hand, you can use color pictures so that the child can repeat the desired color.

First way
A stencil is cut out, placed on cardboard, smeared with glue and poured sand. Instead of glue, you can use double-sided tape. Sand It also sticks well to it. The child is invited to choose any picture to color. We ask, which one did you like? Why did this particular picture interest him? We advise you to choose the colors that you will need for your work. We remind you that we paint large parts first. Apply glue to the area to be covered (use PVA glue and cover sand(sift between fingers, the remains sand shake into a jar. It is easier to color an area that is not bordered by other colors. If they different color and have a common border, it is better to dry one before painting the next one. Then we paint over the small parts.
If we want to get volume, then when the first layer dries, we apply the second. Gradually paint all the parts. The result is wonderful paintings that you can put in a frame and give to your parents.
Parents receive information about the work of the studio by visiting exhibitions children's creativity, consultations and conversations are held regularly.


In addition to flat drawings, you can create three-dimensional compositions using color sand. For this purpose, various glass vessels are used, which are filled with colored sand.

All you need is a funnel, glass vessel, colored sand and a rich imagination. And the sea will splash, a rainbow will appear, flowers will bloom bright flowers. And this is a wonderful continuation of our sand fairy tale.
And when a child gets down to business, he has the opportunity to get acquainted with a huge world, where there is a place for fairy tales and reality, good and evil, and of course, miracles!


1. Throwing technique
Used to create a dark background over most of the work surface. This is done with a few quick movements. Using the edge of the palm, we seem to throw the top off the sand lying along the edge of the glass, towards the center or opposite edge of the glass. When thrown, bizarre sandy stains are obtained. Using this technique it is convenient to depict the sky, earth, sea.
2. Falling asleep technique
Used to create dark surfaces. This technique allows you to create gradations and subtle transitions in dark areas of the picture. We collect sand into a fist and hold it above the surface, turning our fingers down, but not squeezing them very tightly - so that the sand can fall through the cracks. Making small movements from side to side parallel to the surface, carefully draw a dark surface in the right place. When using this technique, surfaces with different contours are obtained.
3. Sprinkling technique
Taking the sand in a fist, we squeeze it and hold it vertically so that the fingers are facing the person drawing. With your hand a few centimeters from the surface, we begin to move along the desired contour. Sand should pour out in a thin stream from the hole between the palm and the bent little finger. We control the width of the line by squeezing our fingers. The faster you draw the line, the thinner and more elegant it will turn out. This type The technique is used to darken design elements within contours or to obtain dark figures with simple and complex outlines.

4. Wiping technique
This type of technique is used to create light areas in a drawing. Wiping excess sand from the surface, we draw the desired silhouette from the remaining sand. Placing your palm on the surface and pressing it slightly, move the brush along the glass in the desired direction. To obtain small light spots we use lateral surface thumb

5. Scratching technique.
The result of scratching is the creation of a light outline, similar to the mark of a pencil or felt-tip pen. Use your fingertip or nail to draw.
It is very useful for children to “communicate” with sand, as well as with any bulk materials. Sand art creativity is not only entertainment for a child, it is also the development of tactile sensations, fine motor skills of the hands, speech, figurative and spatial thinking, and the child’s creative potential. Such activities will help teach children to create not only sand paintings, but also the first animation versions.
Download:
Preview:
CHILD DEVELOPMENT CENTER GBDOU Kindergarten №60
Primorsky district of St. Petersburg
“Drawing with sand on glass.”
Learning the technique of painting with sand on glass in joint activities children and adults.
Prepared by the teacher: . Korsakova E.N.
St. Petersburg 2013
Exists great amount unusual ways and painting technique, but sand painting is fascinating. Sand is a material that attracts. Its flowability attracts both children and adults. Remember the hourglass, even though it was created to keep time, but how difficult it is to take your eyes off the falling grains of sand.
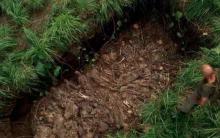
You will never have the question “What to do with a child?” if there is a sandbox in the yard. Making Easter cakes, digging tunnels, building castles - all these activities are loved by kids, only thanks to sand and its properties.
Parapsychologists say that sand takes away negative mental energy, and the touch of sand stabilizes the emotional state.
They have already been developed and exist special programs children's sand therapy. Sand-on-glass painting studios are opening in many cities, where visitors have the opportunity to tinker with sand for an hour or two on a special table with a glass surface and lighting. By attending classes you can learn how to create not only sand paintings, but also animation versions.
It is very useful for children to “communicate” with sand and any bulk materials. Playing with sand is not only entertainment for a child, it is the development of tactile sensations, fine motor skills of the hands, speech, imaginative and spatial thinking, and the child’s creative potential.
Sand painting is very useful hyperactive children. By doing this type of drawing, the child calms down, frees himself from “extra” energy, and learns to better understand himself, his friends and parents. Drawing with sand gives the child the opportunity to immerse himself in the world of his own ideas, fantasies and imaginations.
Sand drawing is especially recommended for children with developmental delays. This type of creativity stimulates the accelerated development of both the child’s thinking and speech. Psychologists explain this by the fact that when working with sand there is a colossal change in the figurative and figurative - logical thinking child.
The texture of the sand itself makes it possible for children to develop coordination of movements of their hands and fingers while drawing. Sprinkling sand from palm to palm, grabbing sand in a fist, leveling sand on glass - all these movements involuntarily affect the development of a child. Children develop dexterity in their hands and fingers. And as you know, fine motor skills are directly related to speech development, which is why all speech therapists recommend games with bulk materials.
Drawing with sand on glass is accessible to children of different ages.
Kids can create simple drawings by drawing with their fingers on an evenly spread layer. Moreover, to change the drawing you don’t need an eraser or a new sheet, you just need to run your finger across the sand.
Older children will be able to create paintings using the technique of pouring sand to create a sand painting.
Drawing with sand on glass is very attractive to teenagers. Pencils and paints are no longer relevant at the age of 12-15, but a modern and creative activity is what is needed.
Be sure to try this drawing method. Take your child to a sand painting studio. If there is none in your city, then try it at home. To paint with sand on glass, you only need a glass table with lighting and sand. You can make the table yourself or buy it from an online store.
Sand for the table can be collected on the beach or purchased at the store. But this is not at all necessary. Instead of sand, you can use salt, semolina, and ground coffee.
It is best to paint with sand accompanied by pleasant music in the twilight. Then an unforgettable atmosphere of magic and creation will appear.
Direct educational activities.
Target : Create children's interest in games and exercises with sand, turning them into an entertaining game;
Tasks:
To form an idea of sand as an object of inanimate nature, its properties (flowability, friability, you can sculpt from wet sand).
Develop mental activity, intelligence, the ability to compare, put forward hypotheses, and draw conclusions.
Develop cognitive processes: perception, attention, memory, imaginative thinking.
Develop speech activity in the process of cognition,
Vocabulary work: activation of the dictionary: dry, loose, opaque;
Vocabulary enrichment: sand painting sand paintings:
Develop tactile sensitivity and fine motor skills of the hands.
Introduce the method of making a picture from sand.
Cultivate an aesthetic sense.
Cultivate accuracy when working with sand.
Build communication skills.
Materials and equipment:
Electronic presentation “Sand and Us”
Multimedia film “Drawings on the sand”, computer projector.
Tablet table with lighting for drawing with sand, sand.
“Magic wand”, thick paper, glue, colored peso To.
Progress of the lesson:
TEACHER:
Hello guys! I'm very glad to see you. Imagine for a moment that we have a magic wand. Where would you like to be?
CHILDREN: GO on a trip.
Educator: Great! I have a magic wand and I invite you to the island of wonders and discoveries
You will turn around yourself on the island of wonders you will find yourself. Music, light, but why doesn’t anyone meet us in a new wonderful country?
There is something hidden under the blanket. You can find out what's here by solving the riddle.
It is yellow and loose,
There is a pile in the yard.
If you want you can take it
Play it all day.
CHILDREN: sand
Educator: Why do you think a person needs sand?
CHILDREN answer.
Educator: Very interesting assumptions.
Absolutely right, sand is used in the construction of roads and buildings, in the production of glass and dishes, in hourglasses, and sprinkled on paths in winter. Children and even sometimes adults play in the sand. It turns out that adult artists also really like to draw in the sand. Today we will try to find out about this.
DEMONSTRATION OF CHILDREN'S PRESENTATION"The SAND OF A MAN'S LIFE"
TEACHER: Oh, now get up, it’s time to check what’s in this magic box...
CHILDREN approach the table.
The teacher pours sand. It's really sand.
The sun is shining brightly,
And he invites the kids
Play "Sand Yard"
Yellow, warm sand
An affectionate friend since childhood
He wants to give us joy.
It is very interesting,
Amazing, wonderful.
Look what comes out of sand,
It is very interesting,
Amazing, wonderful,
Even our guests
You see - they smile.
TEACHER: (Draws the sun on the sand)
Guys, let's say hello to the sand. Let's touch it one by one with the fingers of our right hand.
Listen to your feelings. What sand? (Children's answers).
Let's warm the sand with our own hands, give it a piece of our warmth. To do this, we will press over the entire surface of the sand with our palms. Let's make the sand even and smooth so that it is convenient to draw on it.
Getting to know sand.
Progress of the game:
On a flat surface of sand, children and an adult take turns making handprints: with the inside and outside. It is important to hold your hand on the sand, pressing it slightly, and listen to your feelings
Teacher: I'm pleased. I feel the coolness (or warmth) of the sand. And you? (Children's answers)
When I move my hands, I feel small grains of sand. And how do you feel? (Children's answers)
I turned my hands over, my feelings changed
Now I feel the sand differently, in my opinion it has become a little colder. How do you feel?
It's not very comfortable for me to hold my hands like that. And you? What do you feel?
Children discuss their feelings.
Educator: Let's “slide” our palms along the surface of the sand. When drawing circles and zigzags, imagine that a car has passed, a sled has passed, or a snake has crawled
Place your palm on the edge and perform the same movements
Walk with your palms along the paved trails, leaving your footprints, imagining that we are traveling with you
And now, with the help of our palms, fingers, and fists, we will draw fancy magical patterns on the surface of the sand.
Now we will draw on the surface of the sand separately with each finger alternately with the right and left hand
Then - simultaneously (first only with the index fingers, then with the middle, ring, thumb and finally the little fingers)
Let's play on the surface of the sand like a piano
Now let’s draw a sun from our handprints......
We have determined that the sand is now warm, dry and flowing.
I'll wet it. Let's check if the properties of the sand have changed? How and why? Touch the sand. What has he become?
CHILDREN: cold, damp.
Educator. Wet sand retains its shape well, so it is easy to sculpt with. You've done this yourself many times.
What will happen to the building when the sand dries out? (will crumble).
It’s also good to draw on wet sand.
Get into 2 teams and we'll play
V game "Sand Telegraph".
The teacher draws with his finger the image of a house on the back of the child standing last for the other team - the sun. The one who received the “message” must pass it on to the next player. The one who stands at the sandbox draws an image in the sand.
Educator: Guys, look at the picture you got. I really want to participate in its creation. Katyusha, please draw a “message” on my back
Well done, now draw your own mood in the sand
Oh, now I’ll turn on the backlight, our sand will dry out. And, you and I will be able to draw and see wonderful sand paintings.
Dynamic pause. Game “The sea is agitated...”
Educator: Did you like the pictures? Come on, let's try to draw something.
Exercise “Unusual traces”
Goal: development of tactile sensitivity and imagination.
“The little bears are coming” - the child presses forcefully on the sand with his fists and palms;
“Snakes are crawling” - the child makes the surface of the sand wavy with relaxed/tense fingers;
“Hares are jumping” - the child hits the surface of the sand with his fingertips, moving in
Different directions.
“Spiderbugs are running” - the child moves all his fingers, imitating the movements of insects (you can completely immerse your hands in the sand, meeting each other with your hands under the sand - “bugs say hello”
Exercise “Drawing figures in the sand.”
Goal: to teach the child to sketch spatial bodies and planar figures based on tactile concepts
Progress of the game: the teacher invites the child to touch the figure, and then draw it with his finger in the sand and say that he is drawing. The adult says to the child: “I will cover your eyes with a bandage, give you a figure in your hands, you will touch it, and then, opening your eyes, you will draw it in the sand. Tell me, why did you draw this figure? and so on.
"Magic Transformations"
The teacher draws a circle in the sand and ask the child what it looks like, and then offers to complete the picture so that it immediately becomes clear what it is. The circle can be turned into a sun, a ball, a face, a ball, an apple, a clock and much more
TEACHER. Oh, now try to come up with something and draw something yourself
(children work independently)
Ritual of “exit” from the Sand Country
Educator:
Now children, stretch your hands over the sandbox and make a movement as if you were rolling a ball. Now put it to your heart and repeat after me:
We take with us everything important that happened to us today, everything we learned!”
At the end of the work, the teacher invites the children to wash their hands and gathers everyone on the carpet.
Educator: What wonderful drawings you make.Please tell me, can we place them at an exhibition or give them as a gift to someone? Why?
Children. No. They will crumble.
Children:
(You need to make a glue path, sprinkle sand on it, shake off the excess). The sand will stick to the paper with glue.
Educator: You can continue working with sand at the tables
Try to draw your pictures using glue silhouettes and then they will remain as a memory of our meeting.
Lesson reflection:
Educator:
Children, today we started getting acquainted with magical land. We found out what sand feels like. What is the difference between dry sand and wet sand? I have a lot now good mood: I learned a lot of new things. What new did you learn? (Children's answers)
Children talk about their works.
The works are placed at the exhibition.
Maia. Mayan. Bakulina. Bakulina.
Look at our palms -
They have become wiser!
Thank you, our dear sand,
You helped us all draw!
Explanatory note.
Sand painting is one of the essential means knowledge of the world and the development of aesthetic perception, since it is closely related to independent and creative activity. This is one of the ways to depict the world around us. As you master the technique of drawing with sand, it becomes richer and develops. inner world child.
Sand painting is a unique art form that combines play, activities useful for children’s development, and educational moments. How formerly man will discover in himself creativity, the easier and more interesting his life will be, because creativity is always a striving forward, for the better, for perfection!
Drawing with sand the child is immersed in his fantasy world. He begins to invent a completely different world where castles, dragons, princes and princesses exist. He becomes a fantasist literally this word.
This type of creativity is accessible to children of all ages. Very little ones can create simple drawings. At the same time, to change a drawing or draw a new one, you do not need additional objects such as an eraser or a sharpener; you just need to run your palm or finger across the sand.
During such activities, the sand seems to absorb all negative energy baby, thereby creating harmony between him and the world around him. Sand painting classes help improve a child’s mental well-being and relieve phobias and fear of the unknown.
You will see how sand paintings are born on a small screen in a few moments. The images seem to flow from each other to the accompaniment of music.
Drawing pictures with sand calms you down, coordination of movements becomes better, and hand motor skills develop. For child development This type of art is useful because it develops imaginative thinking. Drawing to music gives double pleasure - I select it specially, creating a meditative background.
Sand drawing is especially recommended for children with developmental delays. This type of creativity stimulates the accelerated development of both the child’s thinking and speech. Psychologists explain this by the fact that when working with sand, a colossal change occurs in the child’s figurative and figurative-logical thinking.
Be sure to try this drawing method. To paint with sand on glass, you only need a glass table with lighting and sand. Sand for the table can be purchased at the store. It is best to paint with sand accompanied by pleasant music in the twilight. Then an unforgettable atmosphere of magic and creation will appear.
Target:
Mastering the sand painting technique, developing accuracy, thrift, and tactile sensitivity through sand painting on glass.
Tasks:
1. Develop mental activity, intelligence, the ability to compare, put forward hypotheses, and draw conclusions.
2. Develop cognitive processes: perception, attention, memory, imaginative thinking.
3. Develop fine motor skills of the hands.
4. Development of creativity, imagination in a child, the ability to use his fingers to depict what he has in mind in the sand.
Preliminary work:
1. A conversation about the properties and purpose of sand.
2. Watch the video “Why do you need sand?”
3. View a presentation on how to paint with sand on glass.
Sand painting techniques:
1. Drawing with a fist, palm, edge of the thumb, pinch, little fingers.
2. Several fingers at the same time.
3. Symmetrically with both hands.
4. Pouring sand from the fist and cutting off the excess.
5. Sliding your palms along the surface of the sand, perform zigzag and circular movements.
6. Perform zigzag and circular movements, placing your palm on the edge.
7. Create all kinds of patterns with the prints of palms, fists, knuckles, and ribs of the palms.
Progress of the lesson:
Educator:
Hello guys! Guess the riddles and find out what we will use to draw today.
Puzzles:
He emerged from the stones
Was born as grains:
Yellow, red, white
Or light grey.
Either it is sea, or it is river.
Guess who he is? (Children sand).
Something can be buried in it,
I love to walk on it
And sleep on it for an hour.
Guess what? (Children sand).
Educator:
Someone paints with gouache
And someone with a pencil.
I suggest to you, children,
Create the drawing with sand.
You pour sand on the glass,
Which is illuminated by light from below.
And, including imagination,
You draw amazing pictures.
Smoothly draw a wave with your fingers,
And streams will flow in the picture.
Lead your big fingers towards
And depict a spruce in the picture.
To show the clouds in the sky
Clench your fingers into fists.
And circling the glass with my fists,
You will draw clouds at the top.
I only told you a grain,
How fantasy can develop.
You just have to start drawing
And the ideas can no longer be stopped.
Educator:
Guys, I suggest you become artists and draw your own picture.
But let's first remember the rules for handling sand.
1. You can only draw with sand on glass; you cannot spill sand on the floor;
2. Do not wipe your hands on your clothes;
3. Do not touch your face or eyes with your hands - tiny grains of sand can get into your eyes;
4. You need to shake off your hands over the table;
5. After work, you need to wash your hands with soap.
Educator:
Let's say hello to the sand. Touch it with the fingers of your right and now your left hand. Now smooth the sand with your palms. Now let's remember the techniques of drawing in the sand. Tell us what you can use to draw on the sand. ( Children's answers.)
That's right, you can draw with one or more fingers, the edge of your palm, your fist, the back of your hand, this part (hereinafter I simultaneously show and explain to the children). If you don't like something or want to change something in your drawing, you can level the sand and continue drawing.

“Drawing with sand” for the development of fine motor skills of the fingers.
1. Ask the child to place his palms on the sand and move them in different directions, as if stroking it.
2. Show your child how he can use fingerprints to create a variety of designs.
3. Together, use your finger to draw numbers, letters, and various geometric figures, and in general, draw whatever the baby wants.

Drawing "Flower"
Pour several handfuls of sand onto the central part of the glass and begin to draw a flower. To do this, we run our fingers along the sand, creating lines free of sand - these are parts of the flower that should be of a light shade ( for example, the middle part of each petal). Next, we form the stem of the flower, outlining its outline with straight lines. As a result, the stem and part of the flower itself will be light color, since the glass in these places will be without sand. The remaining areas will be covered with sand - these are the painted parts of the flower.
Drawing "Sun"
Spread a thin layer of sand on the glass surface. Then use your fist to perform a rotational movement, slightly pressing the brush into the sand. We get an image of the solar disk. Then we draw the rays of the sun with our fingers. You can draw clouds nearby by creating closed wavy lines using your fingers.
Educator:
Guys, you made very beautiful sand drawings. But it’s a pity that they are short-lived and with just one breath of wind or even your breath, they can disappear, fly apart, and crumble. Let's take pictures of yours sand drawings, and then we will show them to your parents and you yourself will once again be able to admire your masterpieces.


In custody, I would like to know your opinion Dear colleagues about using glass sand painting with children. Thank you for your attention.


Calorie content, how to cook and how to cook brown rice
How and where to properly store oysters
The biscuit settles after baking
How to make marmalade with your own hands: apple classics
What a sign: a bird flew into the window (a tit flew in)