Oksana Karpova
Abstract of GCD for Fine Arts “Beautiful” spreading tree in winter" for senior school age
Program content
Teach children to create an image of an object in a drawing, to find beautiful compositional solution (one tree on the whole leaf) . Introduce drawing techniques with sanguine, charcoal, and chalk. Learn to use lines of different intensities as a means of expression. Develop aesthetic perception.
Cognitive.
Clarify the children’s impressions obtained during observations on walks by looking at the illustrations. Tell the children what to draw spreading tree. Ask the children if all the branches are wood of the same color which branches seem lighter. Clarify how to convey this in the drawing.
Developmental.
Show children sanguine sticks and how to draw with them. Please note that sanguine is fragile; it should not be squeezed tightly in your fingers or pressed hard onto the paper. When demonstrating drawing techniques, emphasize that sanguine Beautiful conveys rough bark trees.
Materials for the lesson.
Sheets gray, sanguine, coal, crayons.
When walking, pay attention to what spreading big trees what the thick and thin branches look like in color, look at the illustrations, reproductions with the image trees.
GCD move.
Educator:
Our lesson today is dedicated to trees. First I will tell you a few riddles about them.
What kind of girl is this, not a seamstress, not a craftswoman,
She doesn’t sew anything herself, but uses needles whole year. (Spruce.)
He hid in a golden ball. (Dubochek.)
Girlfriends are standing at the edge of the forest,
Not caring about the weather, they wear white sundresses. (Birches.) Educator:
Let's look at the pictures. Which trees are depicted on them? Children:
Birch, oak, willow, pine, maple, alder, poplar, etc. Educator:
Trees are not only beautiful, but also useful. Many necessary things are made from their wood. Look at the pictures and say what kind of wood things are shown in them.
Children's answers.
Educator.
Today we will draw on a sheet of paper beautiful spreading tree in winter.
But first, you and I will have a rest.
Physical education minute.
We stomp our feet.
We stomp our feet, we clap our hands,
Shake our heads, Shake our heads.
We raise our hands, We lower our hands,
We give hands and run around.
Educator.
Here, listen to something about the amazing birch tree.
Birch trees grow on forest edges and tolerate strong winds. Spruce trees like to grow under birch trees, that’s why They say: "Birch - the nanny of the spruce". When the birch tree blooms, earrings appear.
Furniture, baskets, and bags are made from birch wood. Birch buds contain many vitamins and are used in the manufacture of medicines. In early spring, sap is extracted from birch trees, which is also beneficial for humans.
Educator.
Now let's get to the image beautiful spreading tree in winter. With the help of sanguine, coal, chalk.
But first our fingers will play.
Finger gymnastics.
Let's make peace.
Two thumbs arguing: Who is the more important of the two? We won’t let a quarrel happen and we’ll reconcile them right away.
Children draw their own beautiful spreading tree.
During the drawing process, the teacher individually discusses the composition of the drawing with the children.
I remind you not only about the diversity of breeds trees, but also about their different age.
Bottom line:
Children, look at your work. What wonderful ones we came out with trees. I feel like I'm in a winter forest.
I ask 2-3 children what they depicted trees.
I encourage children.
Children, let's glue them together from these works and make a screen "fairy forest" And decorate the lobby with works. Well done, they did a good job, at the end of the lesson we give the children a gift from the residents winter forest (jam).
"Spreading Tree" Anton A., middle group
Methodology for conducting the lesson. Remember with the children what trees they saw on a walk, what branches they had. Show how, by pressing the pencil in different ways, you can draw thin and thick branches.
While drawing, try to regulate the pressure on the pencil.
Please review all finished drawings. Mark the most expressive ones (those that convey the difference between thin and thick branches, a spreading crown).
Materials. Paper 1/2 landscape size, 3M graphite pencils (for each child).
Observations on walks, looking at illustrations.
Lesson 45. Modeling “Make whatever toy animal you want”
Program content. Teach children to independently determine the content of their work. Strengthen the ability to sculpt using different sculpting techniques. Foster independence and activity. Develop imagination and the ability to talk about the created image.
Methodology of conducting the lesson. Talk with children about familiar animals (fish, birds, etc.).
Consider with your children pre-selected toys depicting animals (hare (rabbit), puppy, mouse, kitten, etc.). Ask the guys what shape the main parts of the animal’s body and other parts are (head, neck, paws, ears, tail).
Invite the children to sculpt whatever animal they want. Offer to show with your hands in the air how they will sculpt the animal.
During the lesson, direct the children’s attention to a more accurate representation of the shape and size of the parts. At the end of the work, look at all the images and enjoy their diversity.
Materials. Toy animals. Clay (plasticine, plastic mass), modeling board, stack (for each child).
Connections with other activities and activities. Reading books, learning poems, looking at illustrations, didactic games (“Which toy is missing”, etc.), games in the play corner.
Lesson 46. Application "Bus"
Program content. Strengthen children's ability to cut out the necessary parts to create an image of an object (object). Strengthen the ability to cut off the corners of a rectangle, rounding them (bus body), cut the strip into identical rectangles (bus windows). Develop the ability to formulate your idea compositionally.
Methodology of conducting the lesson. Remind the children that they saw buses on walks and excursions on the streets of the city (village). Ask about the shape of the main parts and more small parts bus; specify from which paper blank what needs to be cut out (pay attention to each detail prepared for the applique).
Clarify cutting techniques and rounding corners of a rectangle to create a bus body. Call to the board to show a child who has mastered the technique of rounding corners. Remind you that you need to think in advance about how to place all the parts of the bus on a piece of paper so that the bus turns out beautiful. Follow correct use scissors, careful work with paper and glue.
Those children who quickly make the applique are offered to decorate the bus.
All finished works put it on the board, talk about how there are a lot of buses, they are all beautiful and bright.
Materials. Colored paper rectangular shape 10x4 cm for the bus body, strips of blue paper 2x8 cm for windows, 2 black squares 2.5x2.5 cm for wheels, scissors, glue, glue brush, strips of paper different colors(from which the children will cut pieces) (for each child).
Connections with other activities and activities. Games with toy cars, buses. Observations on the street of transport. Reading literature on the topic, looking at illustrations.
Option. Application "Trolley with toys (balls, bricks, cubes)"
Program content. Teach children to use scissors: hold them correctly, cut paper in a straight line, round the corners of a square to get a circle. Learn to compose an image from parts, correctly positioning and carefully gluing them. Develop initiative.
Methodology of conducting the lesson. Show the children a toy cart with bricks, clarify the shape of the toy parts, and paper cutting techniques. Ask the children which of them wants to show the circle cutting techniques at the board.
Offer to cut and paste the cart, and then the load it is carrying. Approach each child and ask what load will be on his cart. Encourage interesting additions.
Materials. Colored paper, scissors, glue, glue brush, napkin (for each child).
Connections with other activities and activities. Children play with toys, clarify ideas about their shape, color, size.
Lesson 47. Modeling "Girl in a long fur coat"
Program content. Teach children to depict a human figure in sculpting, observing the ratio of parts in size. Strengthen the ability to roll clay between your palms; sculpt with your fingers, give the figure the desired shape; connect the parts, pressing them tightly against each other, and smooth out the fastening points.
Methodology of conducting the lesson. Examine with the children a doll in a long fur coat, determine what parts it consists of, what size and shape they are. Clarify sculpting techniques by asking children and showing them with their hands in the air. Remind children that they can mark the buttons on a fur coat and decorate the fur coat. During the work, remind about the relationship of parts and modeling techniques (as necessary).
At the end of the lesson, look at all the dolls, note the variety and imagery of the figures.
Materials. Doll in a long fur coat, sculpture small form. Clay, modeling board, stack (for each child).
Connections with other activities and activities. While walking, while playing with dolls, clarify the proportions of the human figure. Examination of the image of a human figure in illustrations, photographs, pictures.
Lesson 48. Drawing “Draw whatever toy you want”
Program content. To develop children’s ability to conceive the content of a drawing, create an image, conveying the shape of the parts. Strengthen painting skills with paints. Learn to look at pictures, choose the ones you like, and explain what you like. Foster independence. Develop creativity, imagination, and the ability to talk about the created image. Form a positive emotional attitude towards the created drawings.
Methodology of conducting the lesson. Invite the children to name their favorite toys, ask who wants to draw which toy; pay attention to the shape of the main part of the toy, the shape of other parts and details. Ask how you can draw toys. If necessary, help with advice, showing toys.
Review all completed work. Note the variety of images created. Induce a positive emotional attitude towards the drawings.
Materials. Landscape sheets, gouache paints, brushes, jars of water, napkins (for each child).
Connections with other activities and activities. Playing with toys, clarifying their shape. Didactic games, aimed at mastering the shape, size, structure of objects and objects.

"Toy Train" Yana R., middle group
Summary of GCD in senior group on the topic “Winter Tree” (non-traditional drawing techniques).
Gracheva Natalia Vitalievna, teacher primary classes Municipal educational institution of Samara secondary school Kurkinsky district Tula region.Description of material: I offer you a direct summary educational activities for older children (5-6 years old) on the topic “Winter Tree” (non-traditional drawing techniques). This material will be useful for senior group teachers, GPA teachers, teachers additional education. This is a summary of a lesson aimed at introducing children to non-traditional drawing techniques, development creativity and the formation of interest in visual arts.
Lesson topic:“Winter Tree” (non-traditional drawing techniques)
Program content:
- teach children independently in a certain sequence,
create a winter landscape using unconventional techniques drawings (“blowing”, “blotting”, “tamponing”, “spattering”);
- consolidate children’s knowledge about changes in plant life in different time of the year;
- develop speech, attention, thinking, respiratory system, fine motor skills of children's hands;
- promote the development of creativity, fantasy and imagination of preschoolers;
- cultivate interest, love and careful attitude to nature, neatness, independence.
Material for the lesson: tinted paper blue color, containers with diluted white and Brown, pipette, toothbrush, piece of corrugated cardboard, small piece of foam rubber or sponge, rag or wet wipe for hands, cocktail straw.
Demonstrative material: Reproductions, illustrations, photographs depicting winter landscapes.
ICT: computer, projector, screen, electronic educational resources (presentation for the lesson).
Preliminary work:
looking at illustrations of a winter landscape, observing while walking, learning poems and songs about winter.
GCD move"photo ris1.jpg" (“Ready for class!”)
1 Org. moment.
- Hello, dear wizards! Yes, yes, this is exactly how I am addressing you today, because today you will try to perform real magic.
2. Updating knowledge.
-What items do wizards use? (A magic wand, an invisibility hat, walking boots, a self-assembled tablecloth, a magic mirror).
-You and I are wizards and artists, that’s why we have our own magical objects. They are on your tables. Please name them. (Tubes, sponges, paints, pipettes, etc.). These objects will help us perform magic - to paint an ordinary picture in an unusual way.
3.Self-determination for activity.
-But what exactly we will draw with these magical objects, you will find out by guessing the riddle:
Many arms, but one leg.
Let's check if you guessed correctly! (Children are shown a slide depicting the same tree at different times of the year).
"photo ris2.jpg" (“The riddle has been solved!”)

- What does it depict? (Trees)
- What trees do you know?
- How many trees are on the slide? Let's count! (4)
- Compare them. What is the difference? (1 - with flowers, 2 - with green leaves, 3 - with yellow leaves, 4 - without leaves).
- Why do you think they are so different? (Trees look different at different times of the year.)
- Which of my wizards guessed which of these trees we will draw today? (Winter tree)
- Why do you think so? (Because it’s winter time now)
4. Work on the topic of the lesson. Practical part No. 1.
-What does a tree look like in winter? (No leaves, only trunk and branches) (Children are shown a slide showing a tree in winter)
-Are they the same thickness? (No, the trunk is thick, the branches are thin).
_ Look at the tools and tell me, with which of them can we draw a trunk and branches? (Children's guess).
"photo ris3.jpg" "Choosing tools"

You and I are real wizards, so we’ll try to depict our winter tree without a brush and pencil. We will use a straw and air.
To do this, apply a drop of liquid gouache onto blue paper with a pipette and draw a tree trunk, blowing the drop through a tube (“blowing out” the trunk). “photo ris4.jpg” (“Magic drop from a pipette”)

"photo ris5.jpg" (“Blowing out a tree trunk”)

- If necessary, drop more gouache onto the base of the branches and continue to inflate the blot, “drawing” a tree of the desired height.
"photo ris6.jpg" (“The tree has appeared!”)

5. Physical education minute. (on the slide is the animation “Falling Snow”
"photo ris7.jpg" ("Fizkultminutka")

Snowflakes are falling from the sky,
Like in a fairy tale picture.
(Raise their hands above their heads.)
We'll catch them with our hands
(They make grasping movements, as if catching snowflakes.)
And we'll show mom at home.
(They extend their arms, palms up, as if holding out something.)
And there are snowdrifts around,
The roads were covered with snow. (Spread their arms to the sides.)
Don't get stuck in the field so that
Raise your legs higher.
(Walking in place with high knees.)
We go, we go, we go (Walking in place.)
And we come to our house. (Children take their seats.)
6. Work on the topic of the lesson. Practical part No. 2.
- You are simply real wizards! We were able to draw trees using air without a brush or pencil!
- What do trees do in winter? (In winter, the trees seem to freeze and fall asleep until spring.)
- When you go to bed in your bed, what do you do? (Cover ourselves with a blanket)
- Let’s cover our trees with a warm and light blanket so that they can sleep peacefully all winter in a sweet dream. But what can we cover them with? (with snow)
- For this, it must snow in our picture. What tool will help us depict snow?
Take the following “magic” item - toothbrush, dip it in paint and, running a brush along the edge of the cardboard strip, splash it onto the picture, saying magic words:
“Let the snow fall on my magic leaf!”
"photo ris8.jpg" (“Snowball falls from the sky”)

- Our snowball must first cover the branches. Take a piece of sponge, dip it in paint and “cover” the branches to keep them warm.
"photo ris9.jpg" (“We cover the branches with snow”)

- And the snow in our picture keeps coming and going, covering the ground with a white fluffy blanket. And now there is more and more of it under the tree. Draw snow under the tree in the same way (with a sponge) or a toothbrush.
"photo ris10.jpg" (“Snow under a tree”)

- How beautiful winter trees you got it!
"photo ris11.jpg" (“Beautiful tree!”)

"photo ris12.jpg" (“It turned out very beautiful!”)

7. Reflection.
- How do you think our trees feel now? (They feel warm and comfortable. They have become even more beautiful.)
- Listen, it seems to me that they are whispering something to you for your efforts and help. How many of you heard? (Thank you, good wizards!)
What can you wish for them? ( Good night, trees!)
8. Summing up.
- Our lesson has come to an end. What did you learn today, what magic? (Draw in an unusual way).
- What helped you get such wonderful drawings, besides magic? (Diligence, accuracy, attention and, of course, love for nature). If you have such qualities, then I think you can do without magic.
9. Exhibition design.
Attach your drawings to the board using a magnet and admire the winter trees once again. Abstract of GCD in Fine Arts
"Beautiful spreading tree in winter"
for the senior "B" group.
Immaeva Indira Gadzhimusaevna
Abstract of the GCD in fine art “Beautiful spreading tree in winter” for the senior “B” group.
Program content
Teach children to create an image of an object in a drawing, to findbeautiful compositional solution(one tree on the whole leaf ) . Introduce drawing techniques with sanguine, charcoal, and chalk. Learn to use lines of different intensities as a means of expression.Develop aesthetic perception.
Cognitive.
Clarify the children’s impressions obtained during observations on walks by looking at the illustrations. Tell the children what to drawspreading tree . Ask the children if all the branches arewood of the same color which branches seem lighter. Clarify how to convey this in the drawing.
Developmental .
Show children sanguine sticks and how to draw with them. Please note that sanguine is fragile; it should not be squeezed tightly in your fingers or pressed hard onto the paper. When demonstrating drawing techniques, emphasize that sanguineBeautiful conveys rough barktrees .
Materials for the lesson.
Sheets of blue color, gouache paint.
Preliminary work :
When walking, pay attention to whatspreading large trees what the thick and thin branches look like in color, look at the illustrations, reproductions with the imagetrees .
GCD move.
Educator :
Our lesson today is dedicated totrees . First I will tell you a few riddles about them.
What kind of girl is this, not a seamstress, not a craftswoman,
She doesn’t sew anything herself, but she’s stuck with needles for a whole year.(Spruce.)
He hid in a golden ball.(Dubochek.)
Girlfriends are standing at the edge of the forest,
Not caring about the weather, they wear white sundresses.(Birches.) Educator :
Let's look at the pictures. Whichtrees are depicted on them ? Children :
Birch, oak, willow, pine, maple, alder, poplar, etc.Educator :
Trees are not only beautiful , but also useful. Many necessary things are made from their wood. Look at the pictures and say what kind of wood things are shown in them.
Children's answers.
Educator.
Today we will draw on a sheet of paperbeautiful spreading tree in winter .
But first, you and I will have a rest.
Physical education minute.
We stomp our feet.
We stomp our feet, we clap our hands,
Shake our heads, Shake our heads.
We raise our hands, We lower our hands,
We give hands and run around.
Educator.
Here, listen to something about the amazing birchtree .
Birch trees grow on forest edges and tolerate strong winds well. Spruce trees like to grow under birch trees, that’s whyThey say : "Birch - the nanny of the spruce" . When the birch tree blooms, earrings appear.
Furniture, baskets, and bags are made from birch wood. Birch buds contain many vitamins and are used in the manufacture of medicines. In early spring, sap is extracted from birch trees, which is also beneficial for humans.
Educator.
Now let's get to the imagebeautiful spreading tree in winter .
But first our fingers will play.
Finger gymnastics.
Let's make peace.
Two thumbs arguing : Who is the more important of the two? We won’t let a quarrel happen and we’ll reconcile them right away.
Children draw their ownbeautiful spreading tree .
During the drawing process, the teacher individually discusses the composition of the drawing with the children.
I remind you not only about the diversity of breedstrees , but also about their differentage .
Bottom line :
Children, look at your work. What wonderful ones we came out withtrees . I feel like I'm in a winter forest.
I ask 2-3 children whatthey depicted trees .
I encourage children.
Children, let's glue them together from these works and make a screen"fairy forest" Anddecorate the lobby with works . Well done, you did a good job, at the end of the lesson we give the children a gift from the inhabitants of the winter forest(jam) .
Software tasks:
Educational: Teach children to use different pressure on a pencil to depict a tree with thick and thin branches.
Developmental: Develop imaginative perception, imagination, creativity.
Educators: Cultivate the desire to achieve good results.
Materials. 1/2 landscape paper, pencils (for each child).
Connections with other activities and activities. Observations on walks, looking at illustrations.
GCD move
Introduction to the game situation Today we will go to the forest. What grows in the forest? (Now close your eyes, turn around yourself, saying the words: 1,2,3,4,5 - you will find yourself in the forest.
Here we are in the forest. Guys, what trees do you see? What kind of trunk do they have, what kind of branches do they have?
(View slides about trees).
Discovery of new knowledge- Guys, now let’s draw a spreading tree. Remember what the trees look like, the same or not? I suggest drawing beautiful, spreading trees that you remember and liked. By pressing the pencil differently, you can draw thin and thick branches.
Watch how I will draw a tree. First, let's draw a tree trunk. We draw the trunk from the top of the head, lightly pressing the pencil, because the top is thin; and downwards the trunk thickens; going down, we gradually press on the pencil. Next we will draw the branches. Large branches extend from the tree trunk, they all look up. And from large branches there are many small branches. We will draw them with light pressure from a pencil; the more small branches there are, the more spreading and beautiful the tree will be.
The children get to work under the guidance of the teacher.
Finger gymnastics:“1, 2, 3, 4, 5 – let’s count our fingers...”
Reflection. Bottom line. Look what a forest we are in, where there are many spreading trees. Look at the different thin and thick trunks, branches, and spreading crown. How much pressure did you use to draw the barrel? Branches? What is the largest tree? You did your best today. It's time for us to return to kindergarten. Close your eyes, turn around yourself, saying the words: “1,2,3,4,5 - return to kindergarten.”
Download:
Preview:
Abstract of GCD artistic creativity
Drawing "Spreading tree"
Software tasks:
Educational: Teach children to use different pressure on a pencil to depict a tree with thick and thin branches.
Developmental: Develop imaginative perception, imagination, creativity.
Educators: Cultivate the desire to achieve good results.
Materials. 1/2 landscape paper, pencils (for each child).
Connections with other activities and activities. Observations on walks, looking at illustrations.
GCD move
Introduction to the game situationToday we will go to the forest.What grows in the forest? (Now close your eyes,turn around yourself, pronouncing the words: 1,2,3,4,5 - you will find yourself in the forest.
Updating knowledge and fixing difficulties
Here we are in the forest. Guys, what trees do you see? What kind of trunk do they have, what kind of branches do they have?
(View slides about trees).
Discovery of new knowledge- Guys, now let’s draw a spreading tree. Remember what the trees look like, the same or not? I suggest drawing beautiful, spreading trees that you remember and liked.By pressing the pencil differently, you can draw thin and thick branches.
Watch how I will draw a tree. First, let's draw a tree trunk. We draw the trunk from the top of the head, lightly pressing the pencil, because the top is thin; and downwards the trunk thickens; going down, we gradually press on the pencil. Next we will draw the branches. Large branches extend from the tree trunk, they all look up. And from large branches there are many small branches. We will draw them with light pressure from a pencil; the more small branches there are, the more spreading and beautiful the tree will be.
Performing a trial action in a similar situation
The children get to work under the guidance of the teacher.
Finger gymnastics:“1, 2, 3, 4, 5 – let’s count our fingers...”
Reflection. Bottom line. Look what a forest we are in, where there are many spreading trees. Look at the different thin and thick trunks, branches, and spreading crown. How much pressure did you use to draw the barrel? Branches? What is the largest tree? You did your best today. It's time for us to go back to kindergarten. Close your eyes, turn around yourself, saying the words: “1,2,3,4,5 - return to kindergarten.”


Honey cake with sour cream
How to get help from your Angel: advice from clairvoyant Arina Evdokimova Horoscope from Arina Evdokimova
Talismans and Family horoscope from Arina Evdokimova
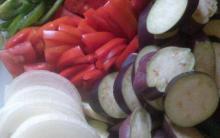
Stewed eggplants with tomatoes and peppers How to stew eggplants with tomatoes
Lavash snacks with fish